
Autumn is here, so that means it’s time for a diy fall wreath!
There’s honestly nothing better than a beautiful fall wreath. They make some of the cutest decor pieces, if I do say so myself.
This simple craft is something I look forward to every year.
It helps me set intentions for the new season and brings a sense of peace to my home.
The grapevine wreath, which is what we’ll be using for this diy project, symbolizes new beginnings.
Although these wreaths appear to be lifeless and bare during colder months, they come back to life during the spring equinox, signifying abundance and renewal.
The circular shape of grapevine wreaths represent unity and eternity and the natural cycle of life.
All of these elements contribute to the magical essence that fall wreaths bring to the autumn season.
Also, can we all collectively say, “Goodbye!” to those expensive fall wreaths that are sold in stores every year?
Those things can cost upwards to $100, which I find absolutely insane! 🤯
This diy fall wreath is super easy to make using a few cheap items from your local craft store.
No hot glue gun, no complicated instructions–just pure seasonal fun!
And can you believe I only spent around $18 (after taxes!) on supplies?
An absolute steal!
If you’re ready to make a your own fall wreath in less than 10 minutes, keep on reading!
*Some of the links in this post are affiliate links. This means if you click on the link and purchase the product or service, I will receive a small commission at no extra cost to you. Click here to learn more.

Things to note
- Check your local dollar store or dollar tree first for all items. These stores are always my first stops because I often find the best prices AND they’re very underrated for seasonal decor.
- Local craft stores, like Hobby Lobby or Michaels, often run 40-50% off sales for floral stems and wreath forms. Take advantage of those discounts!
- Feel free to add other fall craft items to your wreath if you’d like. This is YOUR wreath, so do with it as you please!
- I’ll link all materials from Amazon in case you don’t want to go out to buy them. Don’t underestimate the convenience of having something delivered to your doorstep! It’s also nice being able to read reviews to help you pick the best florals, wreath forms, etc.
Care & storage tips
There are a few ways you can keep your wreaths looking fresh longer.
- First, keep them out of direct sunlight. This will prevent them from fading.
- Refresh your fall wreath by swapping out florals each season. It could easily be transformed into a winter wreath and beyond! This is a sustainable way to reuse and repurpose your materials each year without having to constantly buy new things.
- Lastly, store your diy fall wreath in a bag or box in between seasons so it lasts longer. Want an affordable storage hack? Use an old plastic garment bag! There’s a good chance you have one somewhere in your closet.
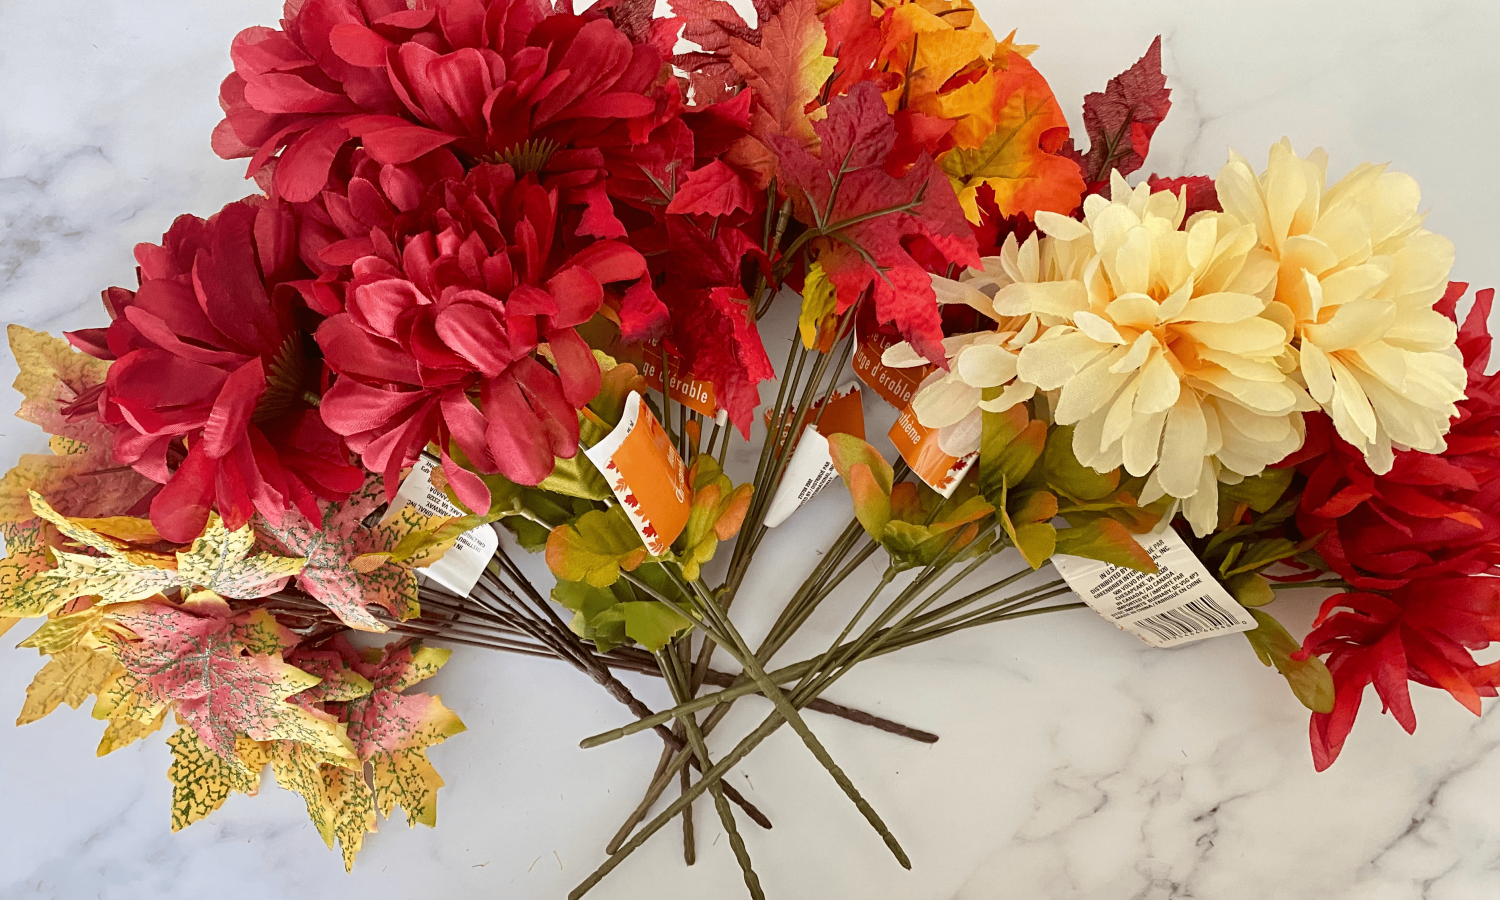
Materials you’ll need
The Amazon products are linked, so just click to purchase what you need!
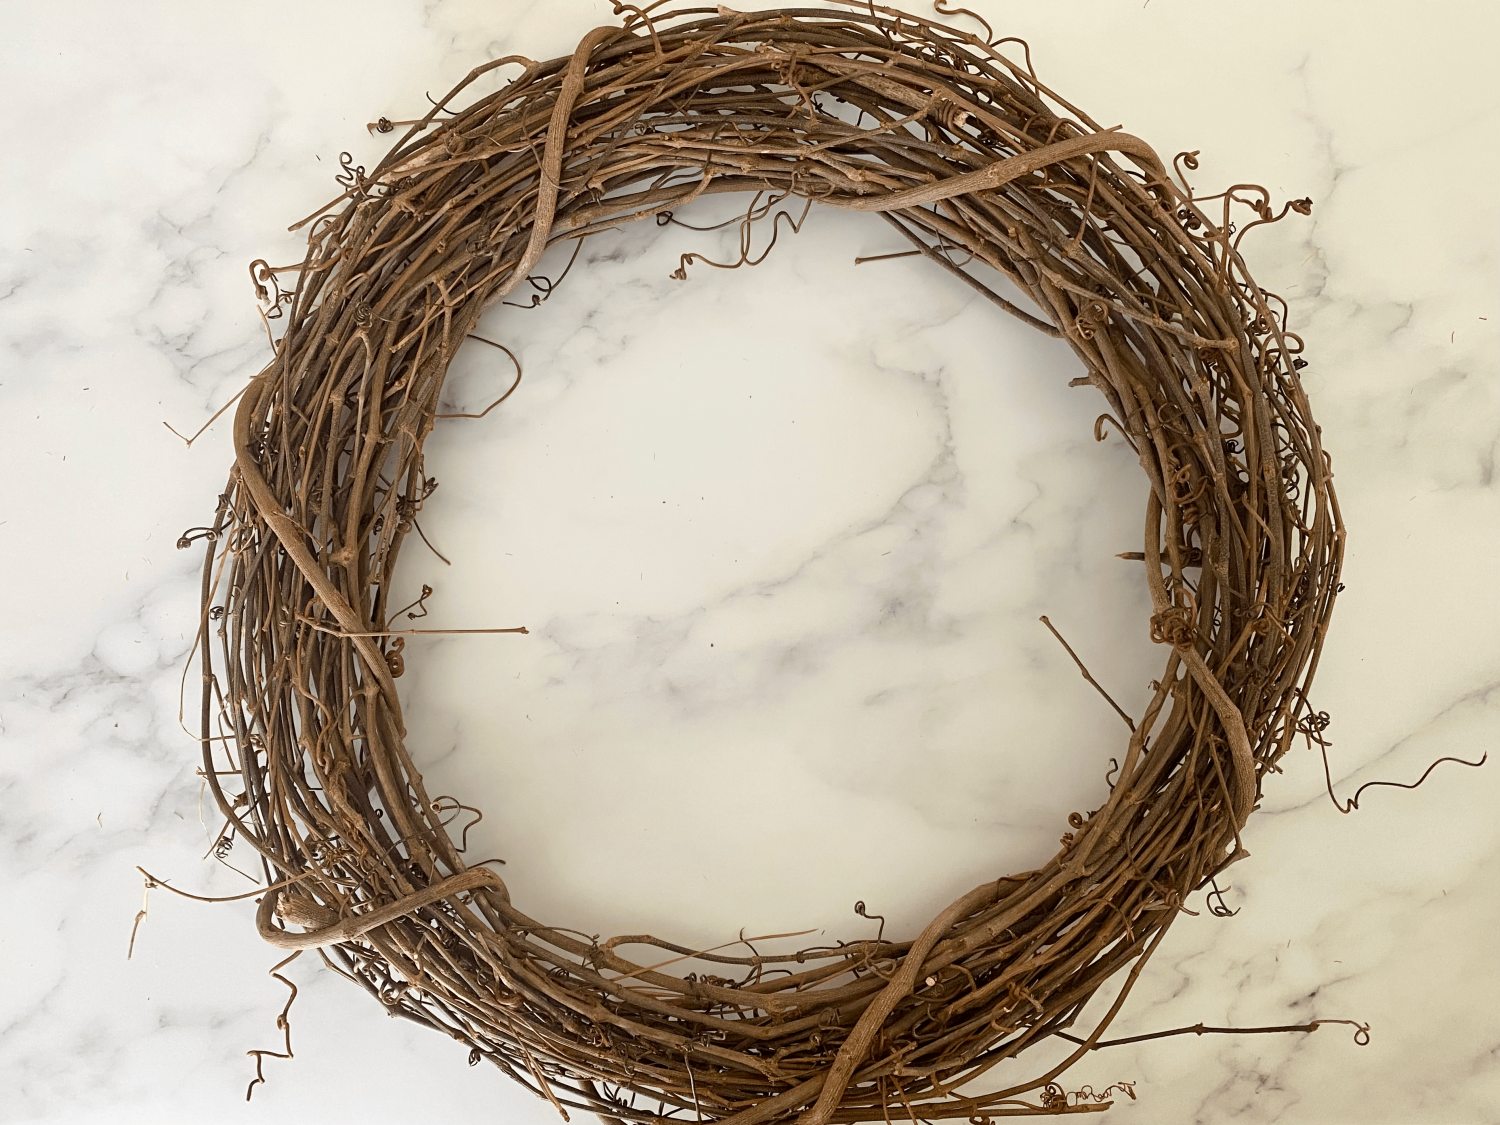
- Grapevine wreath (I have a 14 inch)
- Fake flowers
- Wire cutters or strong scissors
- Wreath hanger
- Drop cloth or newspaper
Step 1: Wreath preparation
Your first step: gather all the supplies you’ll need to make your beautiful wreath.
Next, spread out your newspaper/dropcloth on a flat surface. I recommend working at a table rather than the floor.
Trust me, your back will thank you.
Even though this is a short project, you don’t want to have to constantly bend down while working.

Step 2: Determine your design
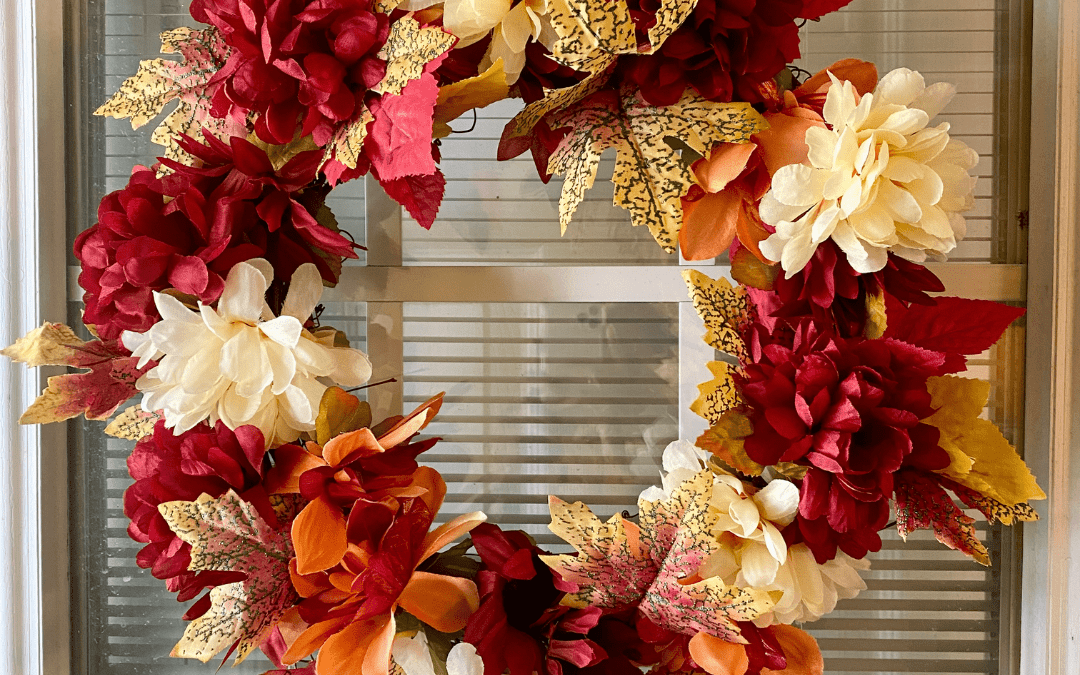
Take a look at your beautiful array of fall flowers and imagine how you want your wreath to look.
Do you want to alternate between colors?
How about having one main color with a splash of another color?
Do you want to make up a design as you go?
It’s entirely up to you!
🍁 Fall Wreath Ideas
Need some inspiration for wreath themes? Try one of these ideas below!
- Classic fall look: warm oranges and yellow florals, pops of red berries
- Minimalist-chic: pampas, neutral florals, eucalyptus
- Elegant aesthetic: burgundy and gold florals, dried wheat grass
- Rustic farmhouse: burlap bows, sunflowers, mini pumpkins
- Bold & festive: jewel-toned flowers, deep reds, gold accents
- Whimsical: fairy lights, colorful ribbon, glitter accents
Additionally, fall scents (cinnamon sticks, mini pinecones, or dried orange slices) can make your entryway smell amazing.
So, add some scented items if you want to take your wreath to the next level.
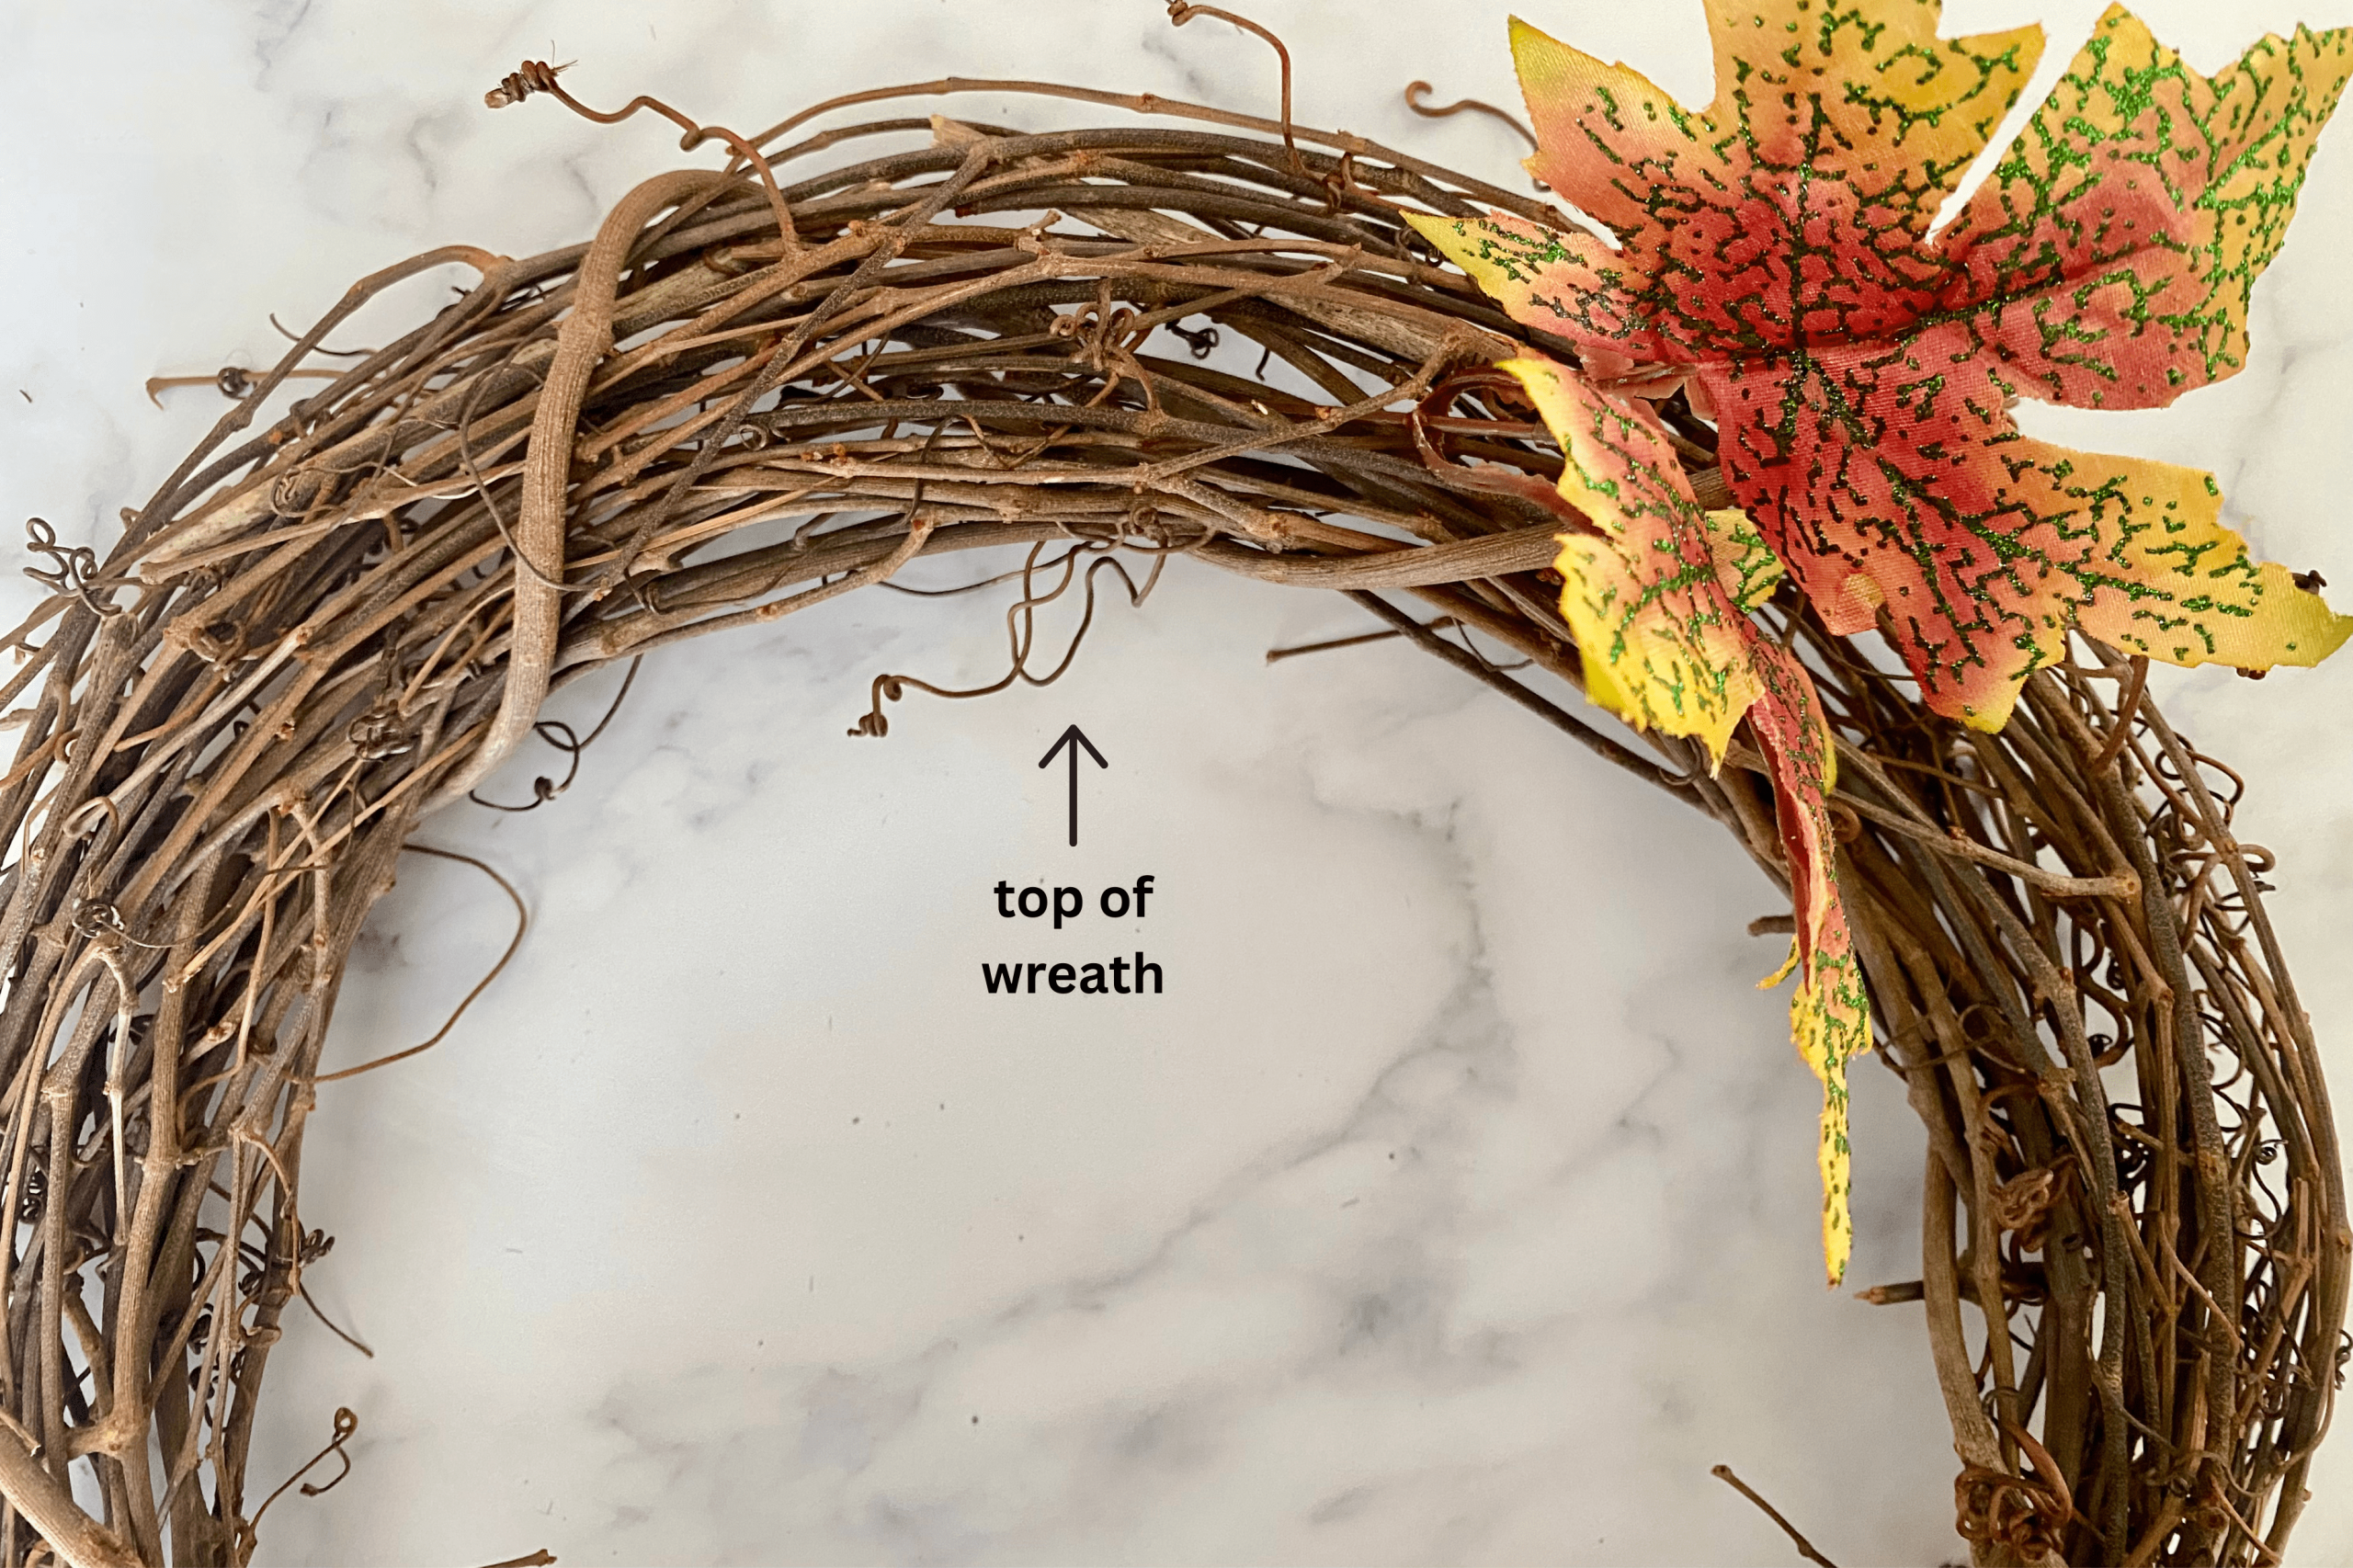
📌 Something to note: remember the spot where you’ll want to place your wreath hanger later. This gives you a good starting point for your design.
Step 3: Trim the stems
This is the point where you grab your wire cutters (or strong scissors) and trim the stems of your floral pieces.
Be careful not to cut too much or too little off.
If the stems are too short, you’ll have trouble keeping them intertwined in your wreath, and they’re likely to fall off.
If they’re too long, they could end up showing through the wreath and/or crowd the other flowers that you add.
Take a look below at the length you should aim for.
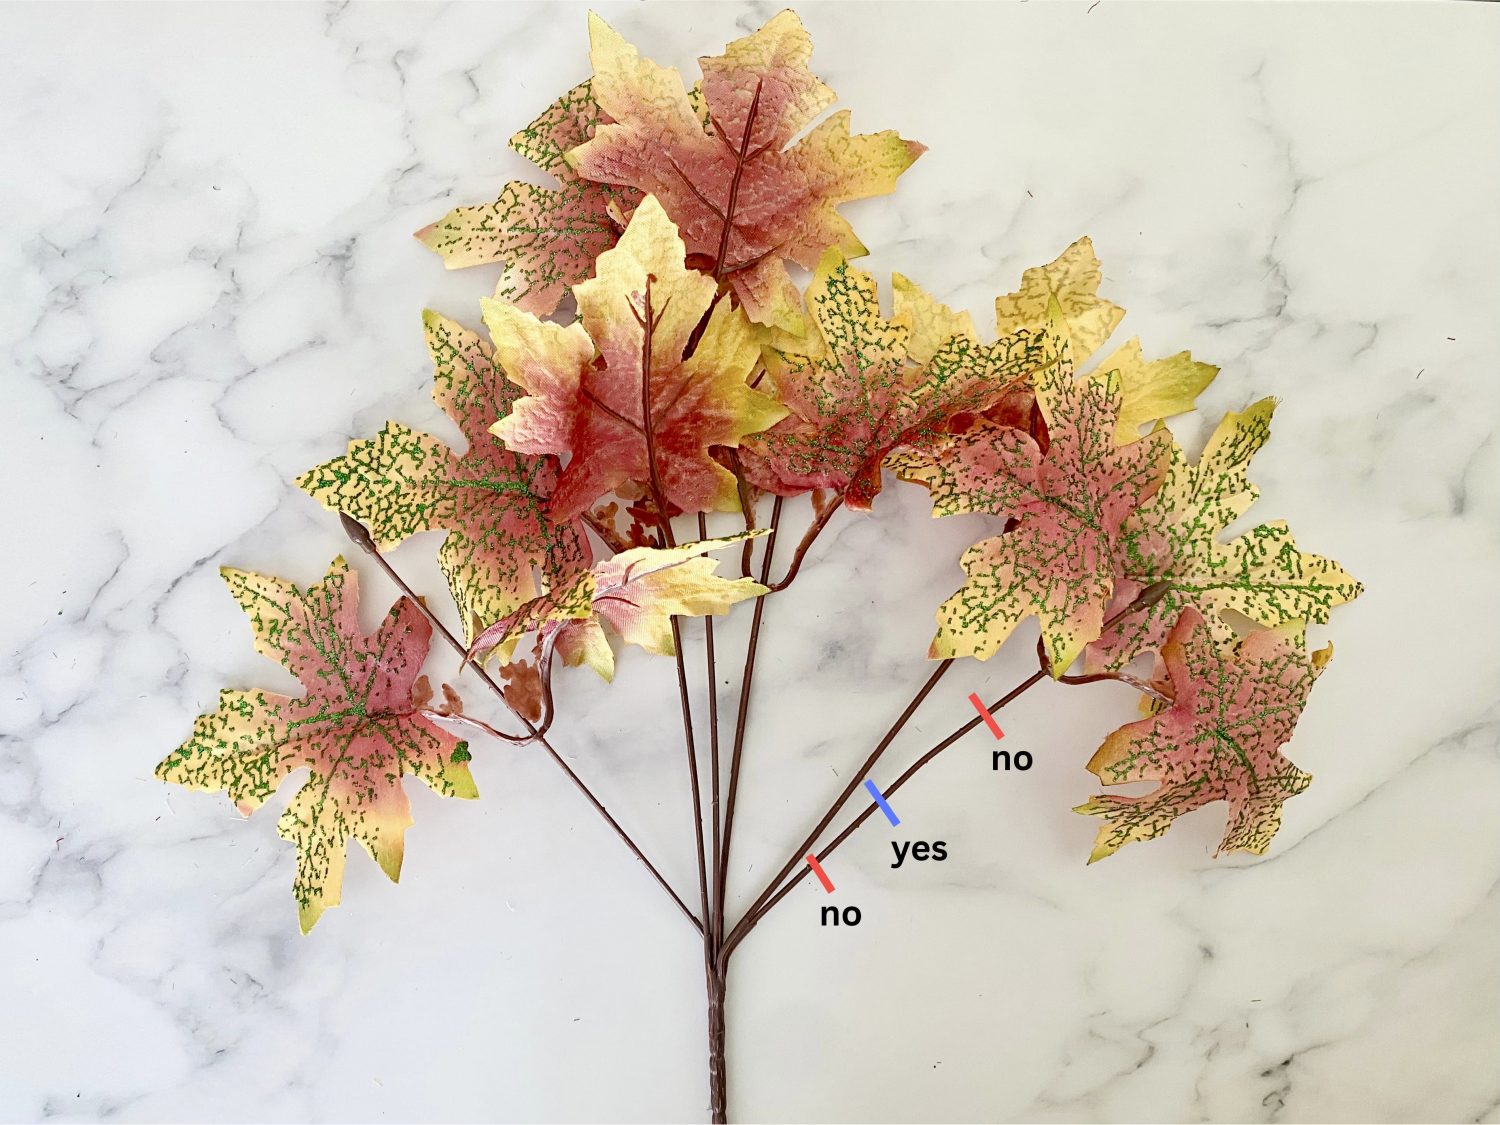
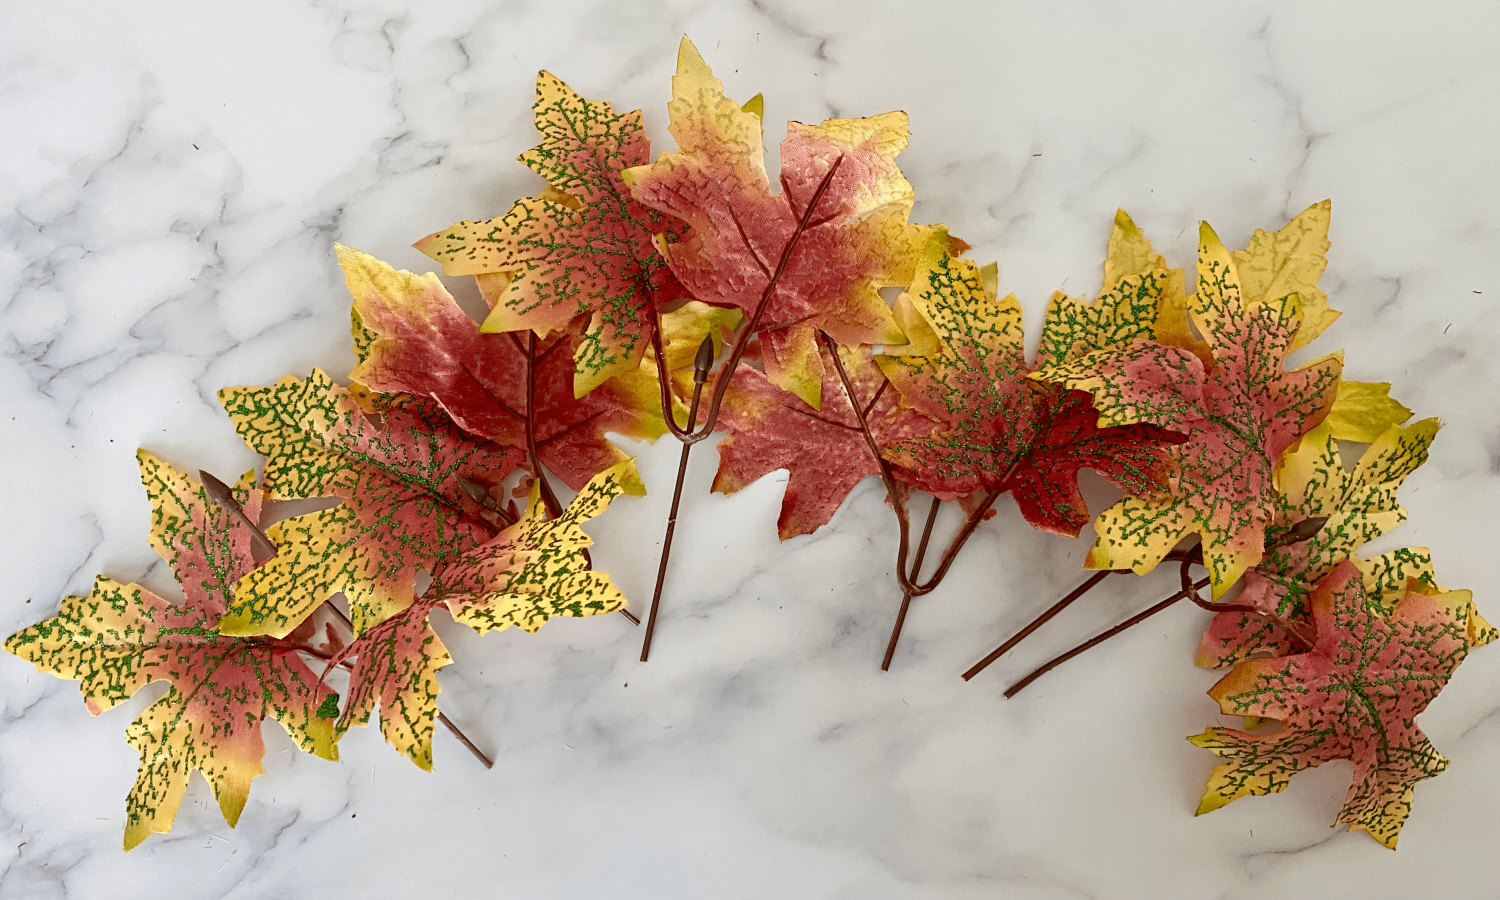
Once you’ve trimmed your stems, throw away the extra ends you won’t be using, along with any stickers that are attached to the flowers.
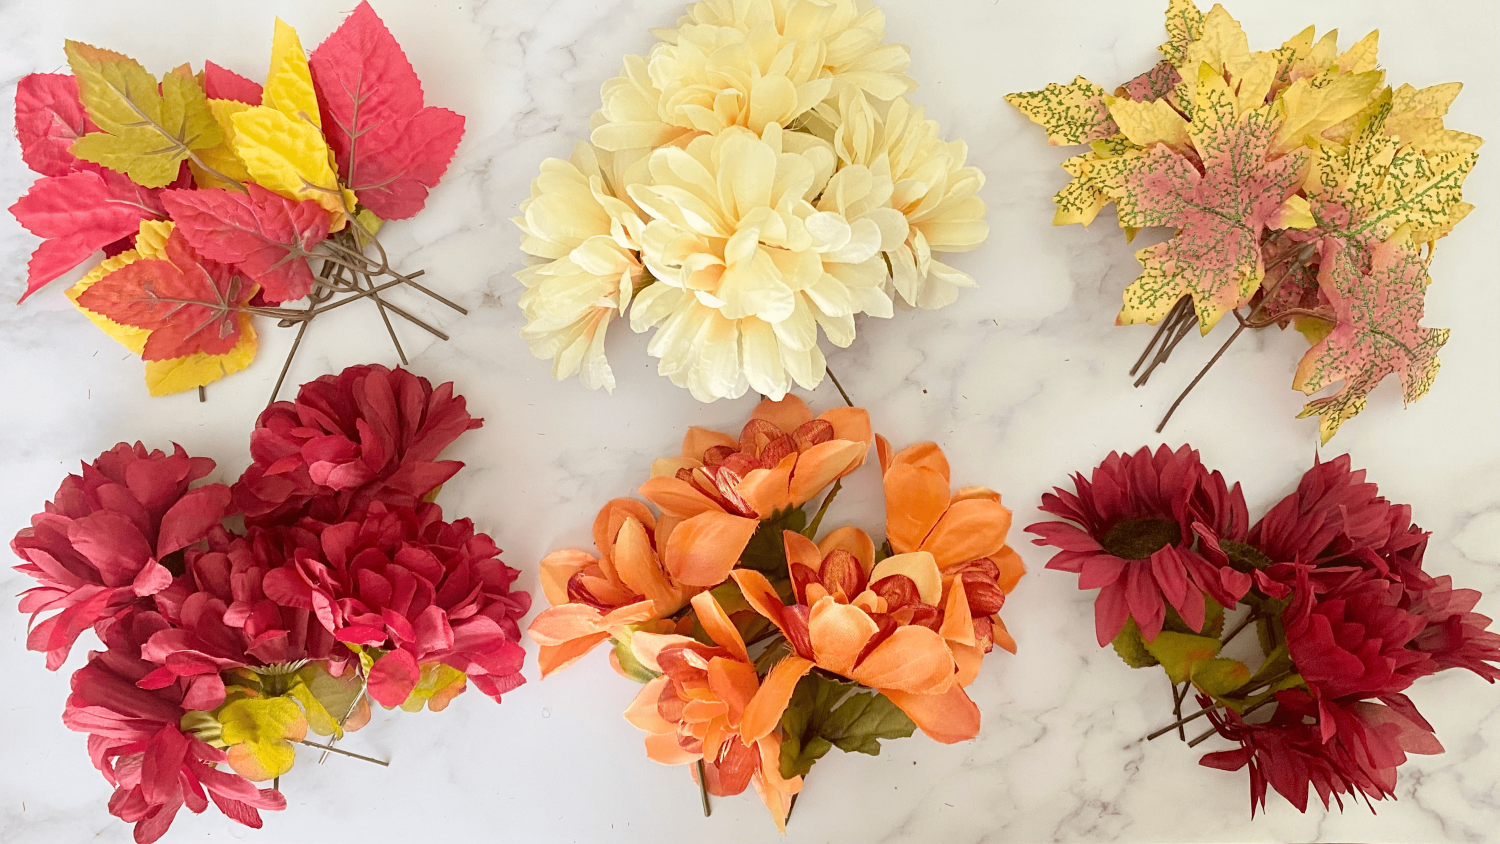
📌 Something to note: I ended up using 6 bouquets.
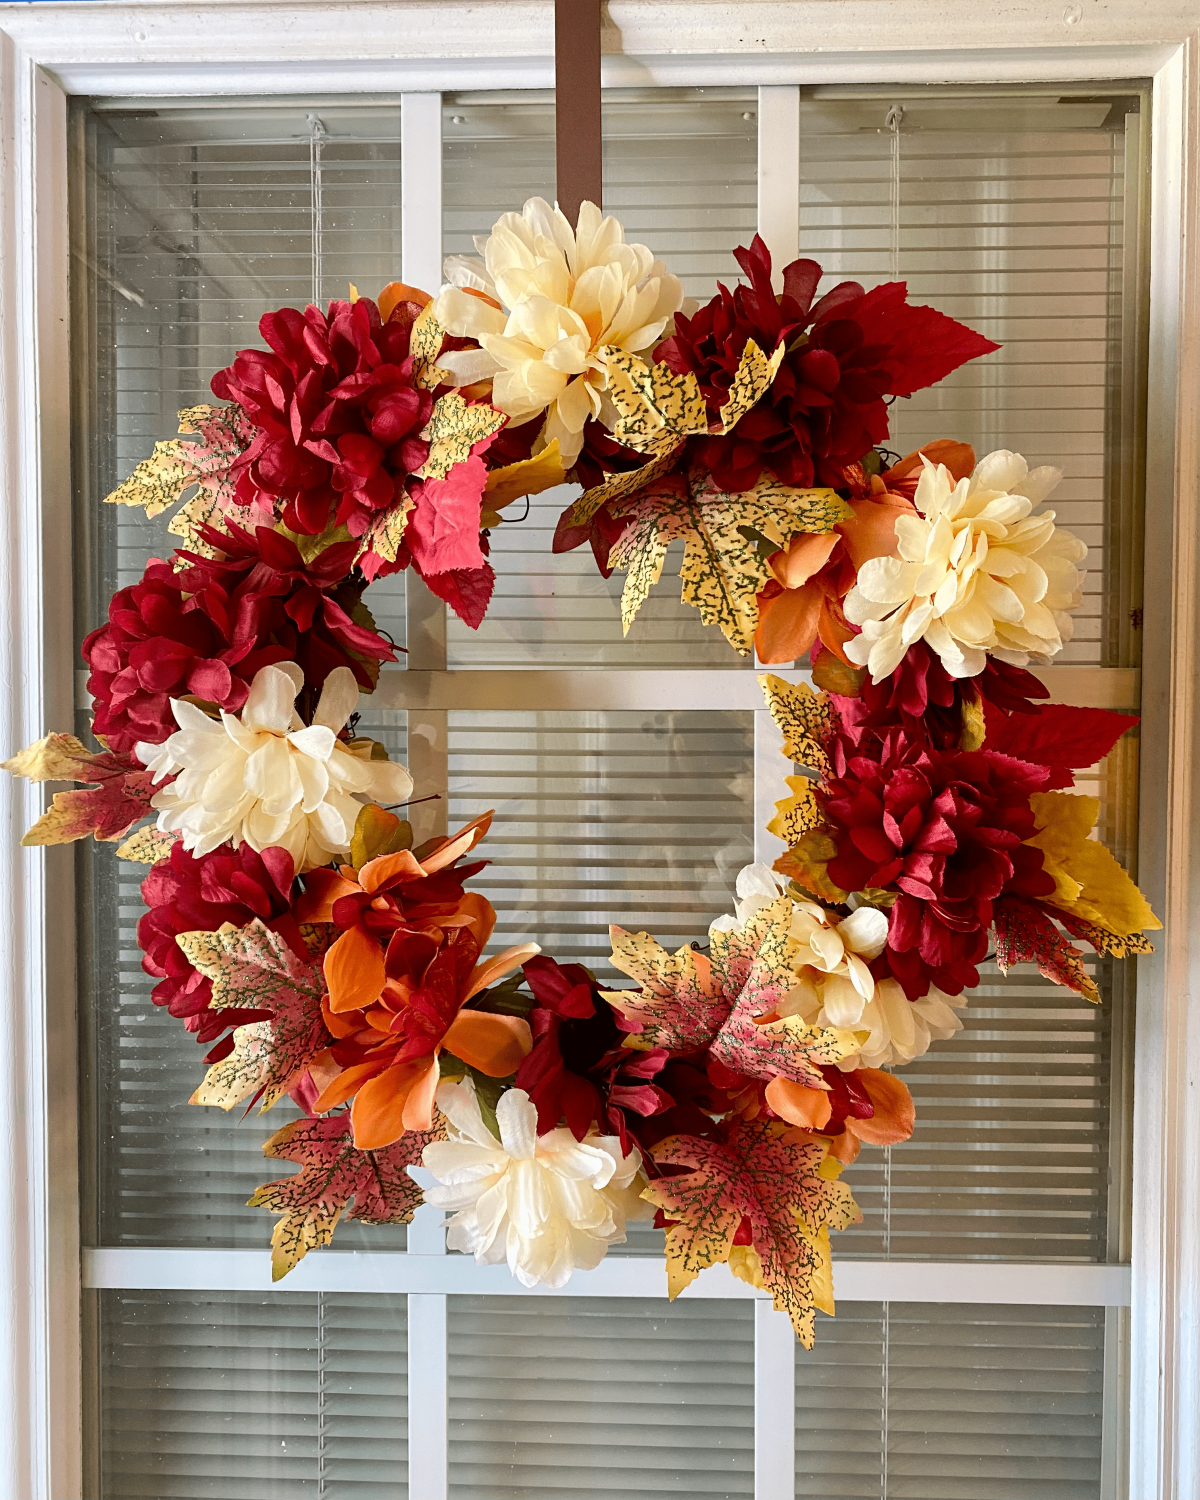
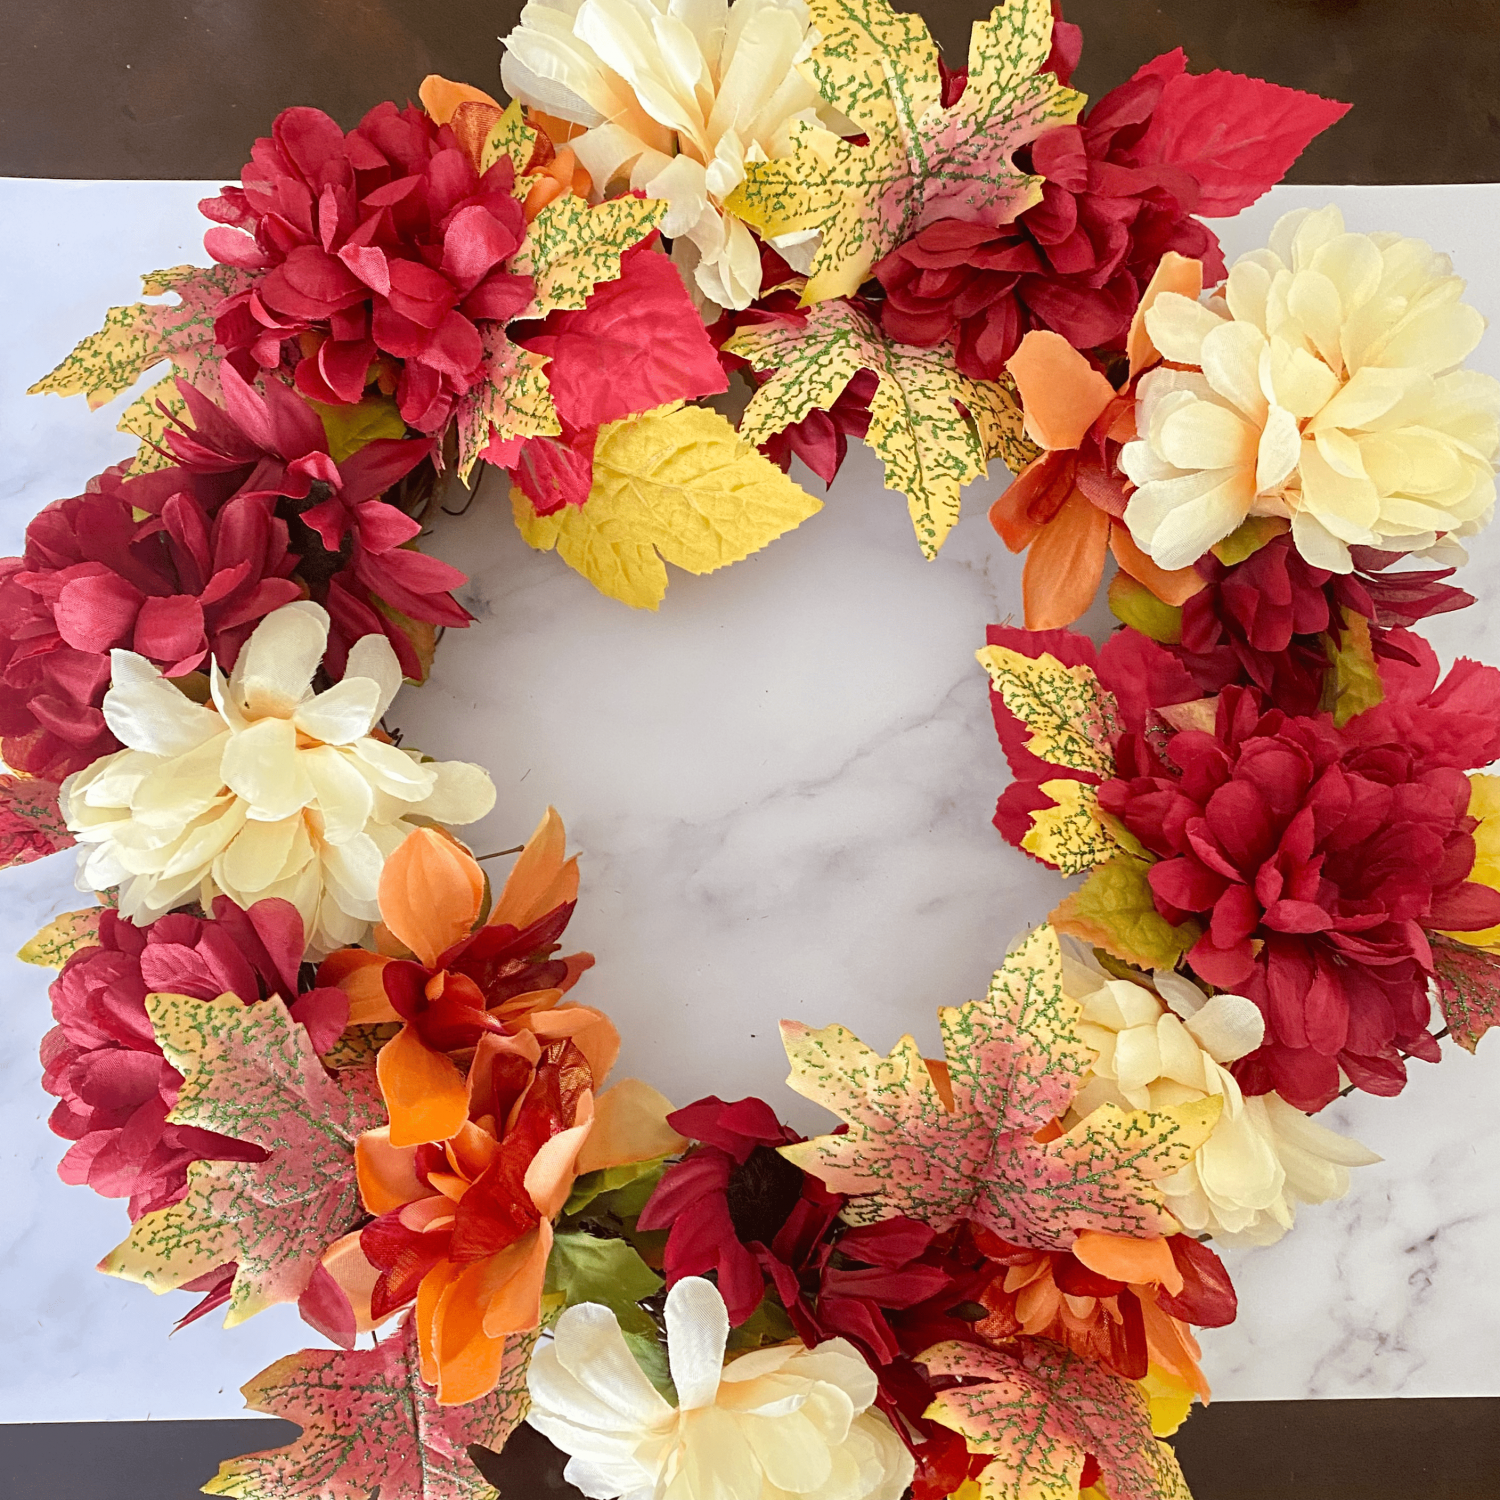
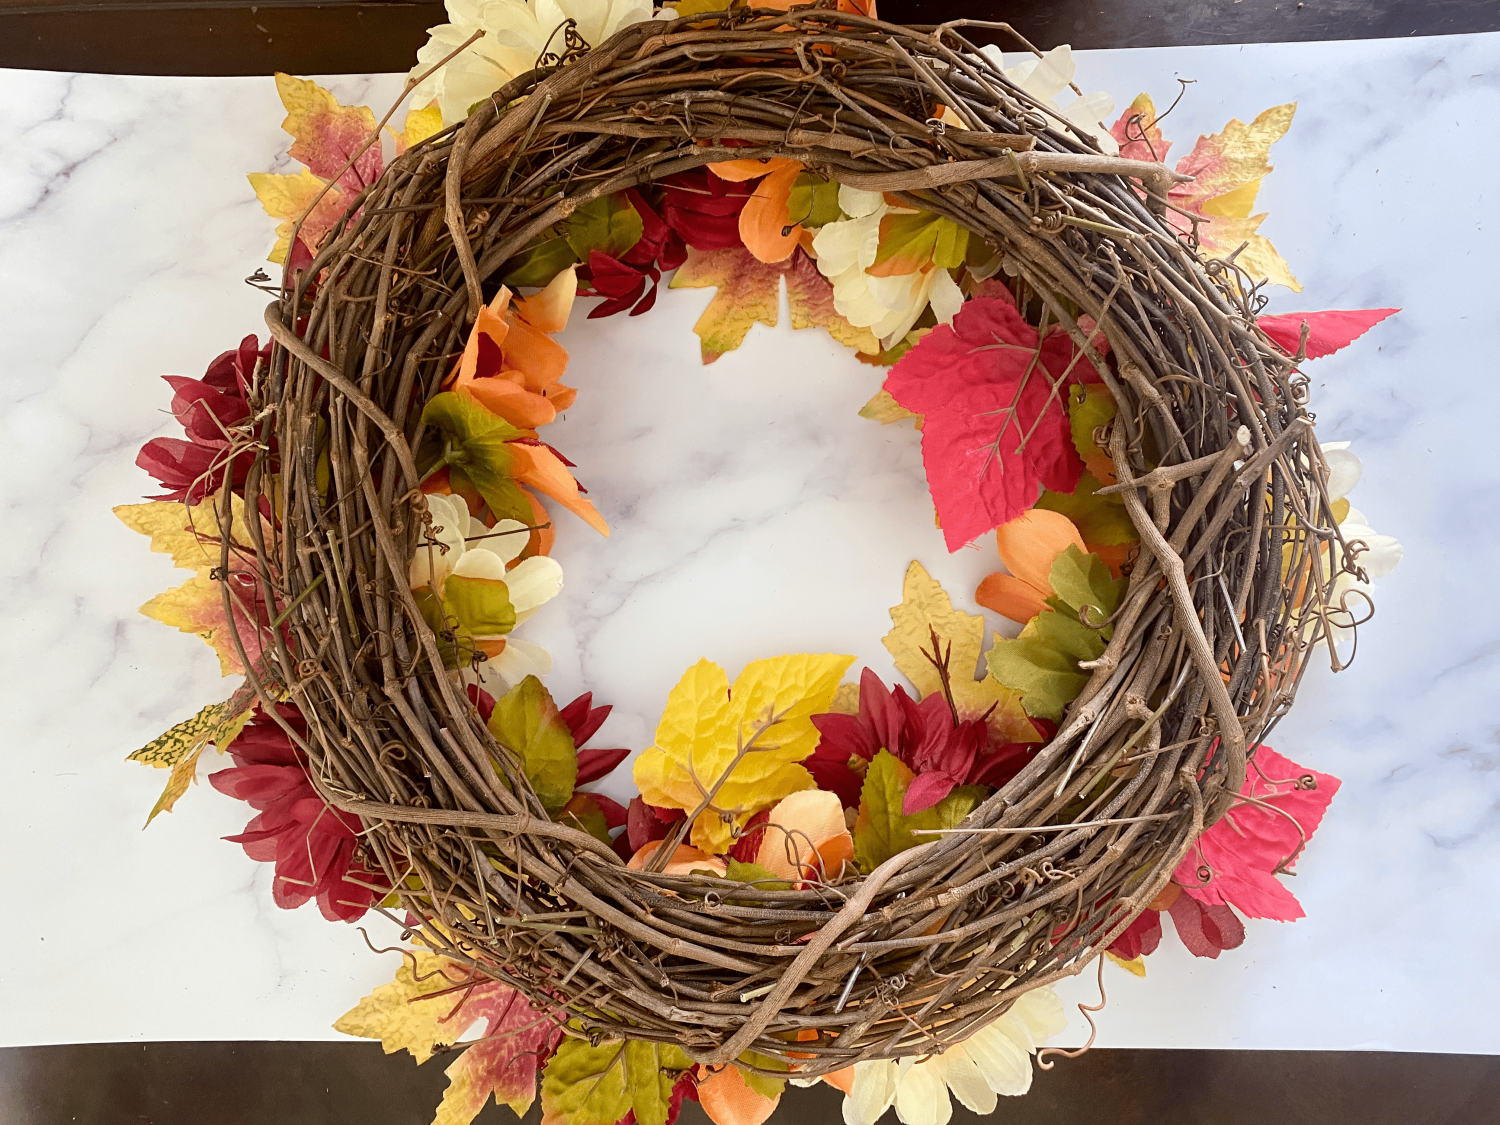
Step 4: Add your flowers & hang it up
Now, the best part!
Stick your flowers through the front of the wreath, ensuring they’re secure.
You shouldn’t see much of the stem, and the flower should go all the way in until you reach the base of the petal.
Keep adding and arranging flowers until you’re satisfied with your wreath.
I recommend taking a step back every now and then as you’re designing to get a full look at your wreath.
Once you’re done, it’s time to place your masterpiece on the wreath holder and hang it up on your front door!
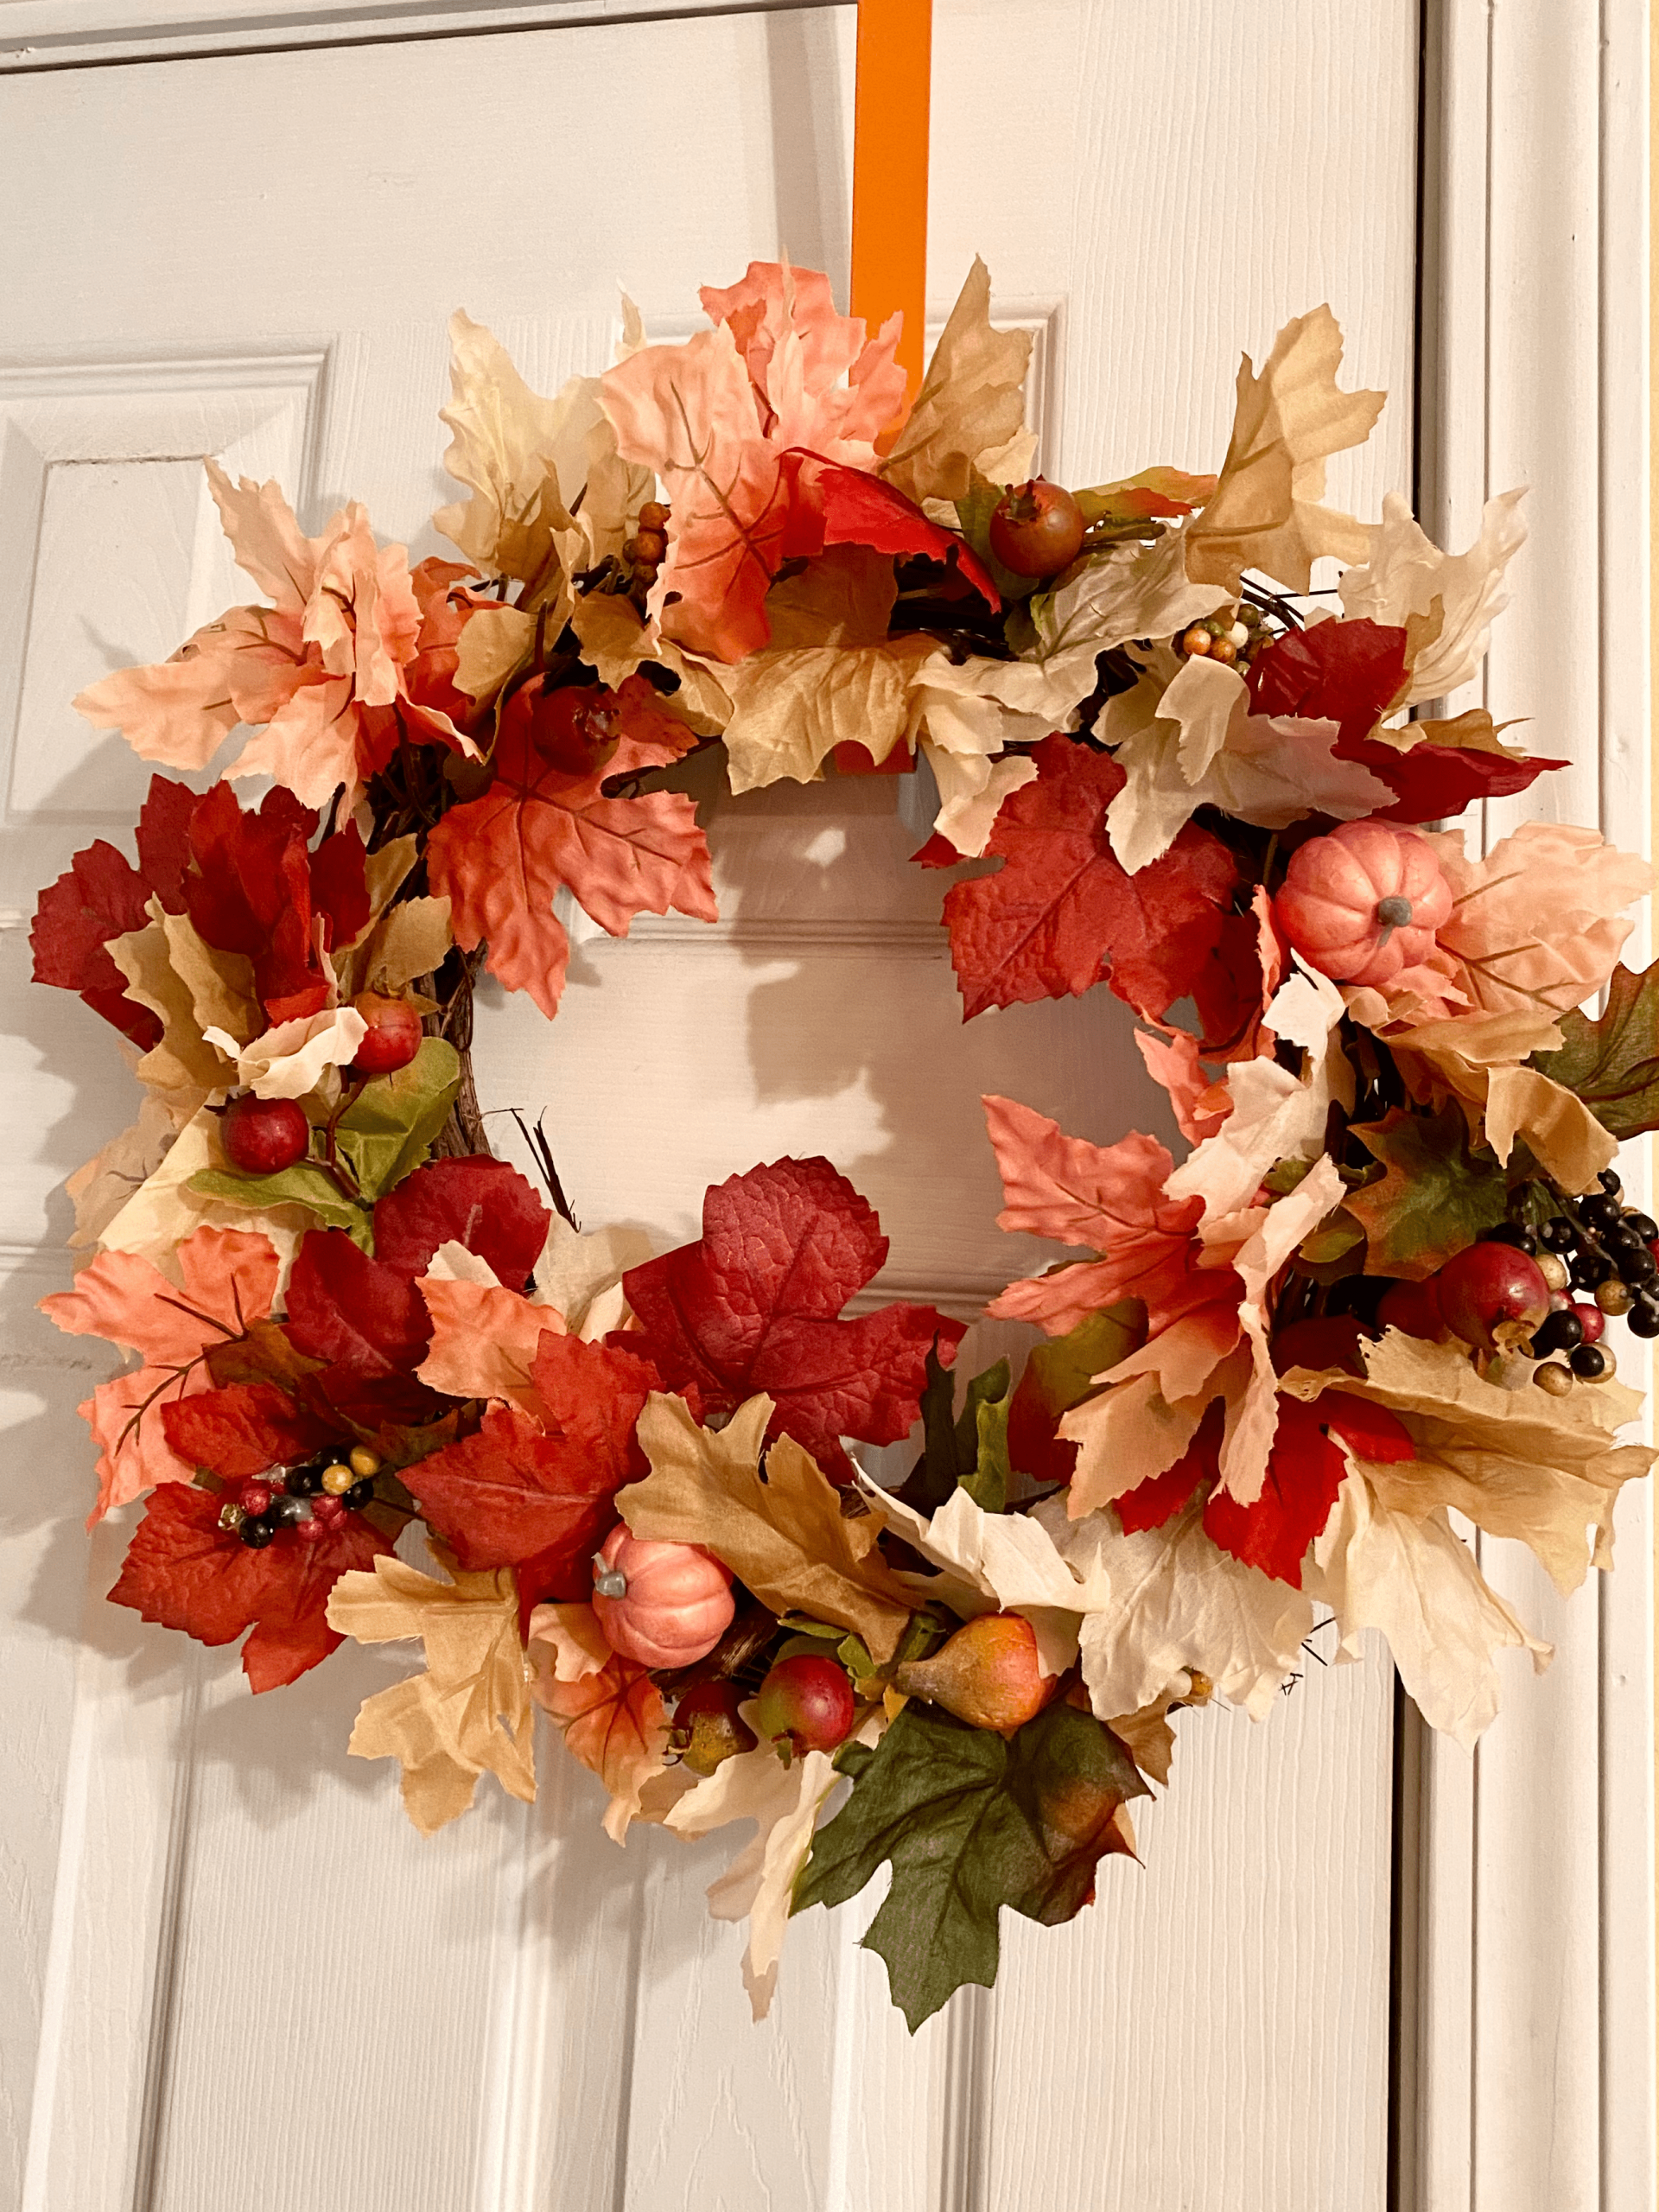
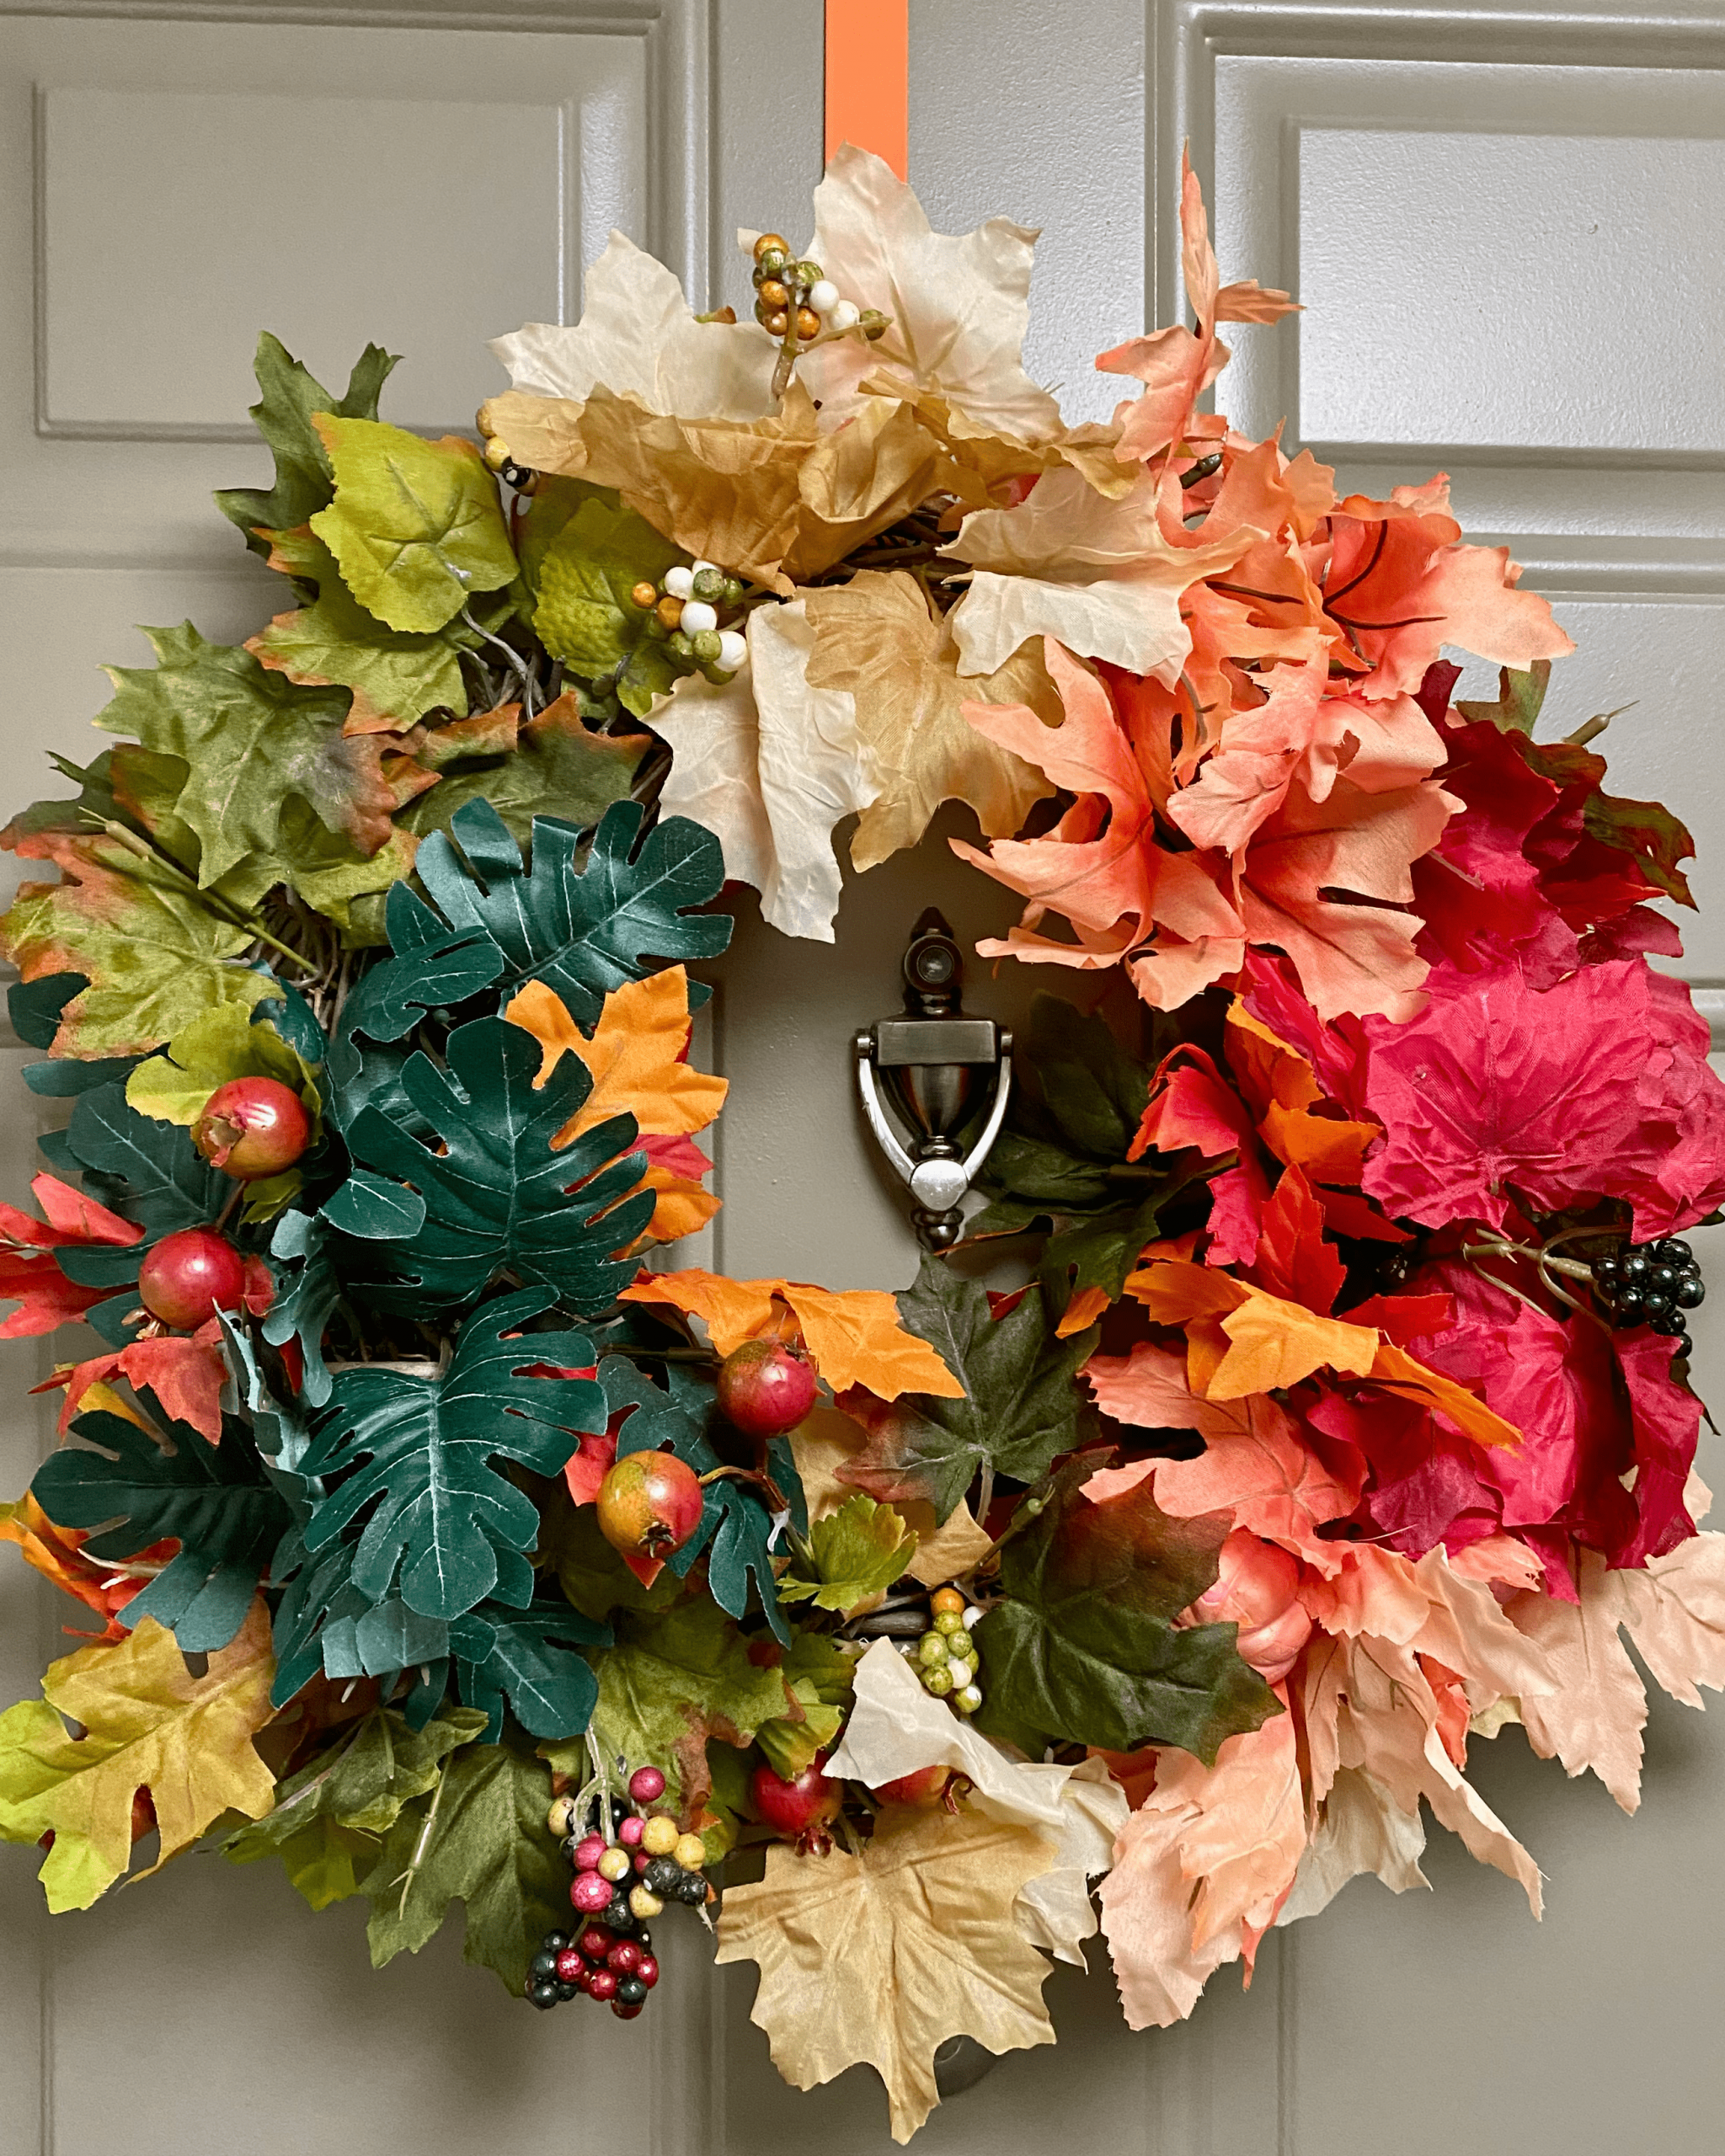
Step 5 (Optional): Finishing Touches
This is the perfect time to add extra craft items to your diy fall wreath if you’d like.
Seasonal ribbons, fairy lights, burlap bows, natural scents, mini pumpkins, etc.!
Decorate as much or as little as your heart desires.
There are no rules to this, so have fun with it.
Happy Wreathing!
Your new fall wreath is now complete!
Your living space should feel warm and welcoming with all the fall colors, so take a moment to bask in it.
I highly suggest pairing wreath-making with a cozy fall reset day at home.
It’s the most relaxing thing ever and a great way to slow down!
Peace, love, and good vibrations. ̴(•◡•)̴♡